9. Further Open Rails Rolling Stock Features
9.1. Train Engine Lights
OR supports the whole set of lights accepted by MSTS.
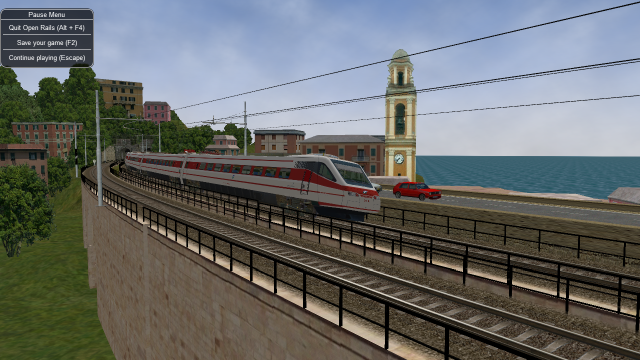
9.2. Tilting trains
OR supports tilting trains. A train tilts when its .con file name contains the
tilted string: e.g. ETR460_tilted.con.
9.3. Freight animations and pickups
9.3.1. OR implementation of MSTS freight animations and pickups
OR supports the freight animations as MSTS does (refueling of water, coal and diesel); when refueling from a water column the animation of the column arm is supported; coal level in the tender of the player loco decreases with consumption and increases when refueling.
The following pickup parameters are taken into consideration by OR for the MSTS animations:
Pickup type
Speed range
Anim length
The pickup animation frame rate is computed as the ratio between the number of frames defined in the .s file, divided by the Anim length.
As in MSTS, Freight Animations are treated differently for tenders than for other vehicles.
Tenders:
First numeric parameter: shape vertical position when full, relative to its origin, in meters
Second numeric parameter: shape vertical position when empty, relative to its origin, in meters.
Third numeric parameter: set to any positive value, or omitted, causes the shape to drop - see below.
As long as the second parameter is lower than the first and the third parameter is either omitted or has a non-zero value, the shape will drop, based on fuel consumption.
If the second parameter is not lower than the first, no movement will take place irrespective of the 3rd parameter.
Other Vehicles:
The numeric parameters are not used.
9.3.2. OR specific freight animations and pickups
9.3.2.1. General
In addition to the support of the MSTS freight animations, Open Rails provides a large extension for freight animations (called OR freightanims below) and pickups.
Following are the native features Open Rails offers:
two types of OR freightanims: continuous and static
continuous OR freightanims are related to commodity loads, like coal, or stones: the load level in the trainset varies accordingly to the amount of load
static OR freightanims are in fact additional shapes that can be attached to the main trainset shape. Such shapes may also include an animation (independent from train behaviour);
both types of OR freightanims can be present in the same trainset, and can coexist with original MSTS freight animations
both types of OR freightanims can be related to locomotives or wagons
more than one static OR freightanim can be present in a single trainset
a wagon can be loaded with different commodities in different moments
commodities can be loaded (in pickup stations) and unloaded (in unloading stations).
wagons supporting continuous OR freightanims may be provided with a physical animation that is triggered when unloading the wagon (like opening its bottom or fully rotating)
OR freightanims are defined with an
ORTSFreightAnims ()block within the .wag or within the wagon section of an .eng file. It is suggested that this block be defined within an include file as described here.
9.3.2.2. Continuous OR Freightanims
A description of this feature is best achieved by showing an example of an
include file, (in this case named AECX1636.wag and located in an Openrails
subfolder within the wagon’s folder). Note that the first line of the file must
be blank.:
include ( ../AECX1636.wag )

Wagon (
    ORTSFreightAnims
    (
        MSTSFreightAnimEnabled (0)
        WagonEmptyWeight(22t)
        IsGondola(1)
        UnloadingStartDelay (7)
        FreightAnimContinuous
        (
            IntakePoint ( 0.0 6.0 FreightCoal )
            Shape(Coal.s)
            MaxHeight(0.3)
            MinHeight(-2.0)
            FreightWeightWhenFull(99t)
            FullAtStart(0)
        )
        FreightAnimContinuous
        (
            IntakePoint ( 0.0 6.0 FuelCoal )
            Shape(Coal.s)
            MaxHeight(0.3)
            MinHeight(-2.0)
            FreightWeightWhenFull(99t)
            FullAtStart(0)
        )
    )
)
The ORTSFreightAnims block is composed by a set of general parameters
followed by the description of the OR freightanims. Here below the general
parameters are described:
MSTSFreightAnimEnabledspecifies if eventual MSTS freight animations within the trainset are enabled (1) or not (0). This is useful if one wants to use a wagon where the load is already shown with a (static) MSTS freight animation. In such a case the MSTS freight animation must be disabled, to use the OR freightanim, that allows to modify the vertical position of the freight shape.WagonEmptyWeightdefines the mass of the wagon when empty. If the parameter is missing, the weight of the load is not considered and the weight of the wagon is always the value present in the root .eng file.IsGondolaspecifies (in case it is set to 1) if the load has to be rotated during unloading, as happens in a gondola wagon. If absent the parameter is set to 0.UnloadingStartDelayspecifies, if present, after how many seconds after pressing of the T key the unloading starts. This is due to the fact that some seconds may be needed before the wagon is set in a unloading layout. For example, a gondola must rotate more than a certain number of degrees before the load begins to fall down.
There may be more than one FreightAnimContinuous subblock, one for each
possible load type. The parameters of the subblock are described below:
IntakePointhas the same format and the same meaning of the IntakePoint line within the standard MSTS freight animations. Following types of loads are accepted: FreightGrain, FreightCoal, FreightGravel, FreightSand, FuelWater, FuelCoal, FuelDiesel, FuelWood, FuelSand, FreightGeneral, FreightLivestock, FreightFuel, FreightMilk, SpecialMail. All these types of loads can be defined. Some of the pickup types (to right of FuelDiesel) need to be coded in W text files.Shapedefines the path of the shape to be displayed for the loadMaxHeightdefines the height of the shape over its 0 position at full loadMinHeightdefines the height of the shape over its 0 position at zero loadFreightWeightWhenFulldefines the mass of the freight when the wagon is full; the mass of the wagon is computed by adding the mass of the empty wagon to the actual mass of the freightFullAtStartdefines wether the wagon is fully loaded (1) or is empty at game start; if there are more continuous OR freightanims that haveFullAtStartset to 1, only the first one is considered.
As already outlined, the wagon may have a physical animation linked with the unload operation.
In a gondola this could be used to rotate the whole wagon, while in a hopper it could be used to open the bottom of the wagon.
The base matrix within the wagon shape that has to be animated must have a name
that starts with UNLOADINGPARTS. There may be more than one, like
UNLOADINGPARTS1, UNLOADINGPARTS2 and so on. Its frame rate is fixed,
and is 1 frame per second as for the other types of OR trainset animations.
To define a pickup point as an unload point, its shape must be inserted in the .ref file of the route as a pickup object . Here is an example of the .ref block:
Pickup (
    FileName ( rotary_dump.s )
    Shadow ( DYNAMIC )
    Class ( "Track Objects" )
    PickupType ( _FUEL_COAL_ )
    Description ( "Rotary dumper" )
)
When laying it down in the route with the MSTS Route Editor, its fill rate must be set to a negative value.
Such a pickup (which in reality is an unloader) may be animated too. The base matrix
within the wagon shape that has to be animated must have a name
that starts with ANIMATED_PARTS. There may be more than one, like
ANIMATED_PARTS1, ANIMATED_PARTS2 and so on. As for the
MSTS standard pickups, the pickup animation frame rate is computed as the ratio
between the number of frames defined in the .s file, divided by the Anim length.
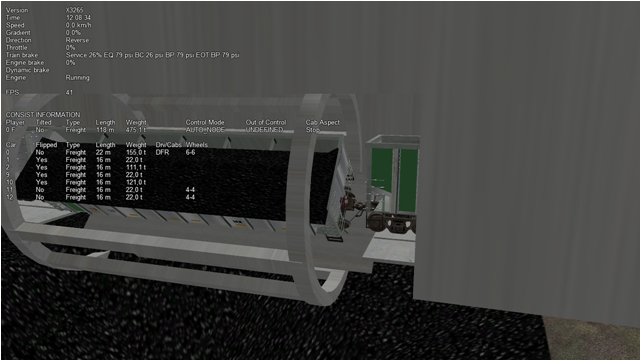
By combining a physical animation of the wagon with an unloader animation effects like that of a wagon within a rotary dumper may be achieved, as seen in the picture below.
Loading and unloading a trainset is triggered by pressing the <T> key when
the trainset is at the pickup/unloader location.
9.3.2.3. Static OR Freightanims
Only the two general parameters shown below are used for static OR freightanims:
.. index::
single: MSTSFreightAnimEnabled single: WagonEmptyWeight single: ORTSFreightAnims single: FreightAnimStatic single: SubType single: Shape single: FreightWeight single: Flip single: Visibility
MSTSFreightAnimEnabled (0) WagonEmptyWeight(22t)
The subblock (to be inserted within the ORTSFreightAnims block) has the
following format:
FreightAnimStatic
(
    SubType(Default)
    Shape(xxshape.s)
    Offset(XOffset, YOffset, ZOffset)
    FreightWeight(weight)
    Flip()
    Visibility ( "Outside,Cab2D,Cab3D" )
)
Where:
SubTypeis not currently usedShapeis the path of the shape file.XOffset,YOffsetandZOffsetare the offsets of the shape with respect to its zero position, and are useful to place the shape precisely.FreightWeightis the weight of the specific load. This weight is added to theWagonEmptyWeightvalue (if present) to provide the total weight of the wagon. If more static OR freightanims are present, each of their weights is added to define the total weight of the wagon.Flip(), if present, flips the shape around its pivot point.Visibility, if present, changes the default visibility of the static freightanim. Default is visible only from outside cameras and from any inside camera of locomotives different from the one hosting the static freightanim. If substringOutsideis present, the static freightanim is visible from outside cameras and from any inside camera of locomotives different from the one hosting the static freightanim; ifCab2Dis present, the static freightanim is visible from the 2D cabview camera of loco hosting the freightanim; ifCab3Dis present, the static freightanim is visible from the 3D cabview camera of loco hosting the freightanim. 1, 2 or 3 of such substrings may be inserted in theVisibilityline allowing for any combination of visibility.
Because more static OR freightanims may be defined for a wagon, in the case of a container wagon that is able to carry more than one container, even as a double stack, it is possible to use a static OR freightanim for each container, defining its position within the wagon.
9.3.3. Physics Variation with Loads
9.3.3.1. Variable Loads (Continuous Freight Animation)
Open Rails supports the variation of key physics parameters in the wagon as the load varies within the wagon. The parameters which can be changed are:
Mass
Brake and handbrake force
Friction (general and wind)
Centre of Gravity (impacts on curve performance)
Drive wheel weight (impacts upon locomotive adhesve weight)
Locomotives and tenders that are also configured will have their loads, and the above physics parameters adjusted as coal and water is used. The adhesive weight (Drive wheel weight) will also be adjusted as the load changes.
To support the correct operation of this feature a known physics starting and finishing point is required, ie the state of these parameters under empty conditions, and the state of these parameters when the wagon or locomotive is full.
To configure the stock correctly the following empty and full parameters need to be included in the ORTSFreightAnims file. Empty values are included in the first block, and full values are included in the second code block. A sample code block is shown below.:
  ORTSFreightAnims
  (
    MSTSFreightAnimEnabled (0)
    WagonEmptyWeight(10.0t-uk)
    EmptyMaxBrakeForce ( 29.892kN )
    EmptyMaxHandbrakeForce ( 9.964kN )
    EmptyORTSDavis_A ( 580.71 )
    EmptyORTSDavis_B ( 5.0148 )
    EmptyORTSDavis_C ( 0.694782 )
    EmptyORTSWagonFrontalArea ( 10.0m )
    EmptyORTSDavisDragConstant ( 0.0003 )
    EmptyCentreOfGravity_Y ( 1.41 )
    IsGondola(0)
    UnloadingStartDelay (5)

  FreightAnimContinuous
   (
    IntakePoint ( 0.0 6.0 FreightCoal )
    Shape(H_Coal.s)
    MaxHeight(0.1)
    MinHeight(-0.85)
    FreightWeightWhenFull(26.0t-uk)
    FullAtStart( 0 )
    FullMaxBrakeForce ( 89.676kN )
    FullMaxHandbrakeForce ( 9.964kN )
    FullORTSDavis_A ( 748.61 )
    FullORTSDavis_B ( 18.0157 )
    FullORTSDavis_C ( 0.838530 )
    FullORTSWagonFrontalArea ( 15.0m )
    FullORTSDavisDragConstant ( 0.005 )
    FullCentreOfGravity_Y ( 1.8 )
   )
)
Note for enclosed wagons, such as covered vans, the freight animation shape may not be required, and therefore the parameters Shape, MaxHeight, and MinHeight can be left out of the file.
The IntakePoint statement is necessary to ensure satisfactory operation of the feature.
Open Rails supports the following freight or fuel load types:
FreightGrain = 1,
FreightCoal = 2,
FreightGravel = 3,
FreightSand = 4,
FuelWater = 5,
FuelCoal = 6,
FuelDiesel = 7,
FuelWood = 8,
FuelSand = 9,
FreightGeneral = 10,
FreightLivestock = 11,
FreightFuel = 12,
FreightMilk = 13,
SpecialMail = 14
The key word, e.g. FreightMilk, is used to define the freight type in the IntakePoint statement,
whilst the number is used to define the pickup point in the route (Replaces the first number
in the PickupType ( 1 0 ) statement).
For load variation in a locomotive, a similar configuration is used in regard to the full and empty
parameters, but as the IntakePoint statement is normally included elsewhere in the ENG file
or tender (or auxiliary tender) WAG file these statements can be left out of the freight
animation section.
For example, the following code block would apply to a steam locomotive (note the absence of the
IntakePoint statement):
ORTSFreightAnims
(
    WagonEmptyWeight(76.35t-uk)
    EmptyMaxBrakeForce ( 29.892kN )
    EmptyMaxHandbrakeForce ( 9.964kN )
    EmptyORTSDavis_A ( 580.71 )
    EmptyORTSDavis_B ( 5.0148 )
    EmptyORTSDavis_C ( 0.694782 )
    EmptyCentreOfGravity_Y ( 1.41 )

  FreightAnimContinuous
   (
    FreightWeightWhenFull(10.34t-uk)
    FullMaxBrakeForce ( 89.676kN )
    FullMaxHandbrakeForce ( 9.964kN )
    FullORTSDavis_A ( 748.61 )
    FullORTSDavis_B ( 18.0157 )
    FullORTSDavis_C ( 0.838530 )

    FullCentreOfGravity_Y ( 1.8 )
   )
)
Notes:
Intake points should be defined within the root WAG file
Intake points, freight animations should not be defined within the INCLUDE file
Empty weight of tender will be the full mass minus coal and water weight
FreightWeightWhenFullwill be the sum of the coal and water weight.Full physics values will be those values for the combined weight of the tender, water and coal.
The parameters for wind resistance ( ORTSWagonFrontalArea and ORTSDavisDragConstant ) can be left out if the area and drag does not change between the full and empty states.
9.3.3.2. Static wagons (Static Freight Animations)
Static wagons can be defined with a full and empty state, however only one freight animation should have full values assigned to it,as OR cannot then calculate the known full state.
A typical configuration code block will be as follows:
ORTSFreightAnims
(
  MSTSFreightAnimEnabled (0)
  WagonEmptyWeight(6.5t-uk)

FreightAnimStatic
(
  SubType(Default)
  Shape( 15ft_3p_HumpSheet2.s )
  Offset( 0, 0, 0)
  FreightWeight( 9.0t-uk )
  FullMaxBrakeForce ( 19.43kN )
  FullMaxHandbrakeForce ( 6.477kN )
  FullORTSDavis_A ( 358.37 )
  FullORTSDavis_B ( 7.7739 )
  FullORTSDavis_C ( 0.718740 )
  FullORTSWagonFrontalArea ( 15.0m )
  FullORTSDavisDragConstant ( 0.005 )
  FullCentreOfGravity_Y ( 1.8 )
 )
)
The empty values for the wagon will be read from the normal base WAG file paramaters.
9.4. Multiple passenger viewpoints
Additional passenger viewpoints may be added within a carriage that is provided with passenger viewpoint.
Such additional passenger viewpoints are defined within an include file with the format shown in following example for the legacy oebarcar.wag (located in the 380 folder) MSTS wagon:
include ( ../oebarcar.wag )

Wagon (
      ORTSAlternatePassengerViewPoints (
              ORTSAlternatePassengerViewPoint (
                      PassengerCabinHeadPos ( -0.0 2.85801 -6.091 )
                      RotationLimit ( 50 270 0 )
                      StartDirection ( 0 0 0 )
              )
              ORTSAlternatePassengerViewPoint (
                      PassengerCabinHeadPos ( -0.5 2.35801 -1.791 )
                      RotationLimit ( 50 270 0 )
                      StartDirection ( 0 0 0 )
              )
              ORTSAlternatePassengerViewPoint (
                      PassengerCabinHeadPos ( 0.9 2.35801 -1.791 )
                      RotationLimit ( 50 270 0 )
                      StartDirection ( -5 -90 0 )
              )
      )
)
At runtime, when in passenger view, the player may pass from one viewpoint to the other by pressing Shift-5.
9.5. Bell animation
Open Rails supports bell animation. The bell animation matrix must be named ORTSBELL within the engine’s .s file. Its default frame rate is 8 frames per second. The default frame rate may be modified through the optional parameter ESD_ORTSBellAnimationFPS (n), to be inserted within the .sd file related to the .s file. n defines the animation FPS. It is advisable that the related sound stream within the .sms file is synchronized with the visible animation. To accomplish this the .wav file should contain two bell strokes, which time interval is equal to the time interval of a bell swing from an oscillation end point to the opposite end point. As the first bell stroke should not start immediately, but when the bell is about at the maximum of the swing, the first stroke within the .wav file should be at the time distance equivalent to the oscillation from center point to an oscillation end point. The file should have one cue point at its beginning and one after the time interval of a complete bell swing forward and backward, and should have a final fadeoff for best result.
9.6. C# engine scripting
To simulate especially complex behavior, Open Rails provides a C# scripting interface for a number of systems on the player locomotive. Like the Open Rails program itself, these scripts are written in .cs files containing C# classes, but they are compiled and linked at runtime, so they don’t depend on changes in the core program itself and can be distributed with rolling stock content. Scripts will run if referenced by OR-specific fields in the .eng file.
System |
C# class |
.eng block |
|---|---|---|
Brakes |
|
|
Circuit breaker |
|
|
Electric power supply |
|
|
Train Control System |
|
|
Scripts reside in a Script subfolder within the engine’s folder and must
contain a class named after the script’s own filename. For example, if the
script’s filename is AmtrakTCS.cs, OR will search for a single class named
AmtrakTCS. (It is also possible to place the script in another location,
such as a Common.Script folder in the TRAINSET folder, by prepending the
appropriate amount of parent directory tokens ..\ relative to the engine’s
Script folder.) The script’s code runs on the UpdaterProcess thread. This
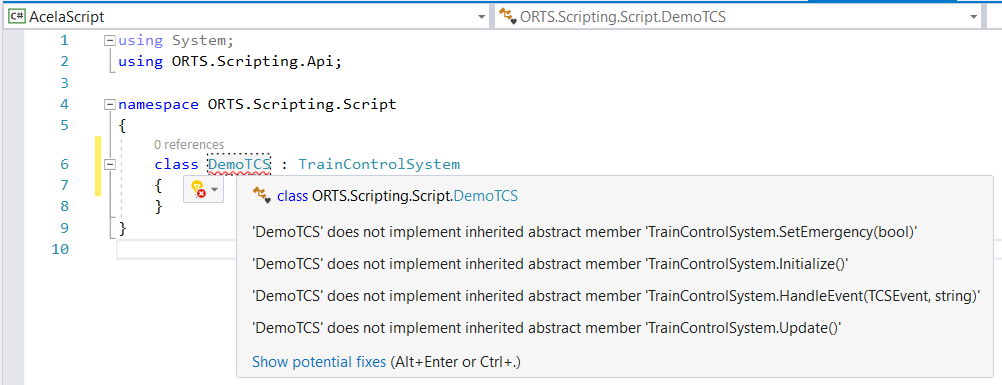
example, which would need to be placed in a file named DemoTCS.cs,
illustrates the minimum code required for a Train Control System script:
using System;
using ORTS.Scripting.Api;

namespace ORTS.Scripting.Script
{
    class DemoTCS : TrainControlSystem
    {
        public override void HandleEvent(TCSEvent evt, string message) {}
        public override void Initialize()
        {
            Console.WriteLine("TCS activated!");
        }
        public override void SetEmergency(bool emergency) {}
        public override void Update() {}
    }
}
Observe that the script’s class must reside in the ORTS.Scripting.Script
namespace and that it subclasses the abstract class of the desired system. It
also references external assemblies with using directives. OR makes the
following .NET assemblies available to scripts:
System
System.Core
ORTS.Common
Orts.Simulation
Scripts communicate with the simulator by invoking methods in the base class.
For example, this script might invoke the TrainLengthM() method of the
TrainControlSystem class, which returns the length of the player train. More
methods are available in the ORTS.Scripting.Api.AbstractScriptClass class,
which TrainControlSystem is itself a subclass of.
Finally, if a script contains a syntax or typing error, OR will log an exception during the loading process and run the simulation without it.
9.6.1. Developing scripts with Visual Studio
While it is certainly possible to develop scripts with a plain text editor, the code completion and debugging aids available in an IDE like Visual Studio make for a vastly more comfortable programming experience. If you have a development environment set up to build Open Rails, you can use Visual Studio to edit your scripts with these creature comforts. What follows is a suggested workflow:
First, in your copy of the OR source code, make a copy of your
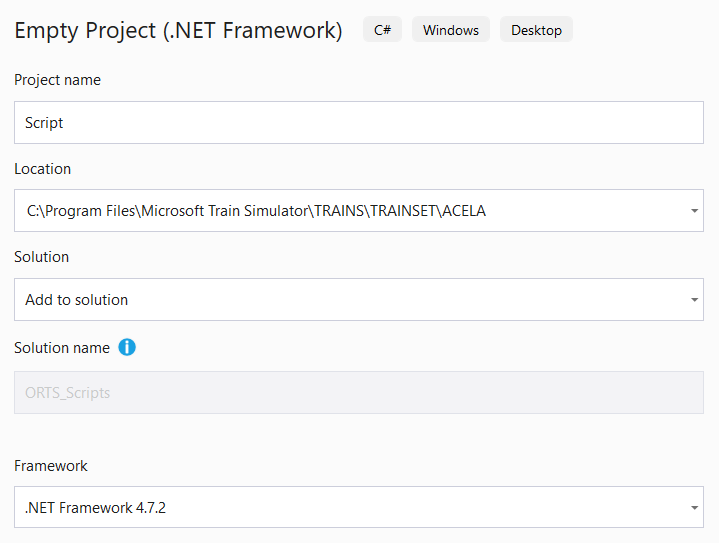
Source\ORTS.slnfile. Keep it in theSource\folder, but give it a novel name likeORTS_Scripts.sln. (You could also modify the original ORTS solution, but then you’d have to remember not to check it in to source control.) Add a new project to the solution and select the empty .NET project.In the configuration dialog, set the new project to be added to the existing solution, set its location to be the folder of the engine you’re scripting, and set its name to “Script”. (For now, you must use “Script”, but you can rename the project after it’s created.) You can leave the .NET framework version set to its default. Then, create the project.
The new project folder becomes the very
Scriptsubfolder that OR will search for scripts. Add references to the ORTS.Common and Orts.Simulation assemblies, which will enable IntelliSense features inside your editor when you edit scripts. You may now rename the project as you like (which will not rename the folder) and delete the pregenerated App.config file.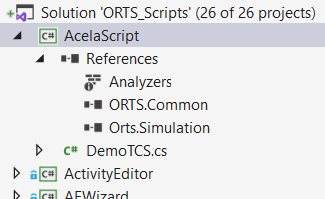
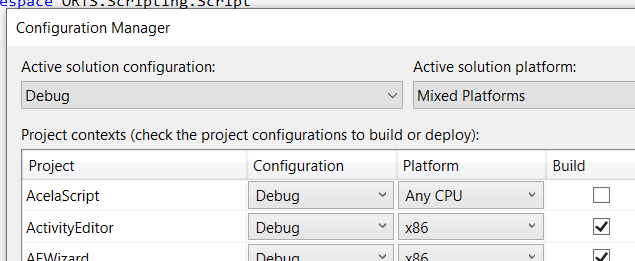
Finally, open the Build Configuration Manager and set the new script project not to build for both the Debug and Release configurations.
With this setup, Visual Studio will type-check your scripts and make suggestions when you use the Open Rails API. You can also set breakpoints within your script, which will be caught by RunActivity.exe if run inside Visual Studio.
Note that Visual Studio uses relative paths, so if you ever move any folders, you’ll need to fix the references by hand.
9.6.2. Brake controller
The brake controller script customizes the behavior of the train’s brakes, allowing for much greater systems fidelity compared to what is possible with the model inherited from MSTS. For this purpose, the script can read the state of the brake controls and set the air pressures of the brake reservoirs.
Use the following .eng parameter to load a brake controller script:
Engine (
    ORTSTrainBrakeController ( "YourBrakes.cs" )
)
or:
Engine (
    ORTSEngineBrakeController ( "YourBrakes.cs" )
)
The .cs extension is optional. “MSTS” loads the default MSTS-compatible implementation, so do not use this name for your own script.
9.6.3. Circuit breaker
Available for electric locomotives only. The circuit breaker script controls the behavior of the locomotive’s circuit breaker.
Use the following .eng parameter to load a circuit breaker script:
Engine (
    ORTSCircuitBreaker ( "YourCB.cs" )
)
The .cs extension is optional. “Automatic” and “Manual” load the generic OR circuit breaker implementation, so do not use these names for your own script.
9.6.4. Electric power supply
Available for electric locomotives only. The power supply script determines whether or not the locomotive is serviceable given the current line voltage, pantograph position, circuit breaker state, etc.
Use the following .eng paramater to load an electric power supply script:
Engine (
    ORTSPowerSupply ( "YourEPS.cs" )
)
The .cs extension is optional. “Default” will load the generic OR power supply implementation, so do not use this name for your own script.
9.6.5. Train Control System
9.6.5.1. General
The Train Control System, or TCS, script is intended to model train safety and cab signalling systems. It can manipulate the locomotive’s controls and speed limit displays, impose penalty brake applications, read upcoming signal aspects and speed limits, and play warning sounds.
Use the following .eng parameters to load a TCS script:
Engine (
    ORTSTrainControlSystem ( "YourTCS.cs" )
    ORTSTrainControlSystemParameters ( "YourTCS.ini" )
    ORTSTrainControlSystemSound ( "YourTCSSounds.sms" )
)
ORTSTrainControlSystem refers to the TCS script in the engine’s Script
subfolder. For this field, the .cs extension is optional.
ORTSTrainControlSystemParameters, an optional field, refers to an .ini file,
also in the Script subfolder, whose parameters will be made available to the
TCS script through the GetBoolParameter(), GetIntParameter(),
GetFloatParameter(), and GetStringParameter() methods of the
TrainControlSystem class. This .ini file provides for easy customization of
the behavior of the TCS script by end users.
This is an excerpt from an .ini file:
[General]
AWSMonitor=true
EmergencyStopMonitor=false
VigilanceMonitor=true
OverspeedMonitor=false
DoesBrakeCutPower=true
BrakeCutsPowerAtBrakeCylinderPressureBar=
[AWS]
Inhibited=false
WarningTimerDelayS=3
BrakeImmediately=false
TrainStopBeforeRelease=false
ActivationOnSpeedLimitReduction=true
SpeedLimitReductionForActivationMpS=11.176
BeaconDistanceToPostM=1186
AppliesCutsPower=true
As can be seen, the .ini file is divided in subgroups. As an example, parameter [AWS]Inhibited would be read by following line of code in the script :
AWSInhibited = GetBoolParameter("AWS", "Inhibited", false);
where the final false is the default value, if the parameter can’t be found.
ORTSTrainControlSystemSound, an optional field, refers to a .sms file either
in the engine’s SOUND folder or in the global SOUND folder. If provided,
OR will load this sound library alongside the locomotive’s standard cab sounds.
The TCS script can play back sounds using any of the TriggerSound... methods
of the base class, which in turn activate the TCS-related
discrete triggers numbered from 109 through 118.
8 further generic discrete sound triggers are available, named GenericEvent1 to GenericEvent8 and accessible to the script by lines like following one:
SignalEvent(Event.GenericEvent1);
9.6.5.2. Access to the Simulation methods and variables
The abstract class for the TCS scripts provides a significant amount of methods to access variables of interest for the TCS: as an example:
public Func<int, Aspect> NextSignalAspect;
might be called within the script as follows:
var nextSignalAspect = NextSignalAspect(1);
which would return the aspect of the second normal signal in front of the player train.
However it is quite impossible to foresee all needs that a TCS script has and to provide a method for everyone of these needs. For this reason following method is available:
public Func<MSTSLocomotive> Locomotive;
which returns a handle for the player locomotive instance of the MSTSLocomotive class. Through such handle all public classes, methods and variables of the OR Simulation environment can be accessed within the script.
9.6.5.3. Generic cabview controls
Often Train Control Systems have a quite sophisticated DMI (driver-machine interface), which can include a (touch screen) display and buttons. Being the display fields and icons and the buttons specific of every TCS, a set of generic cabview controls are available, which can be customized within the TCS script. More precisely 48 generic cabview controls, named from ORTS_TCS1 to ORTS_TCS48 are available. All 48 may be used as two state or multistate controls, like e.g.:
MultiStateDisplay (
                    Type ( ORTS_TCS13 MULTI_STATE_DISPLAY )
                    Position ( 405 282.3 36.3 20.8 )
                    Graphic ( ../../Common.Cab/Cruscotto_SCMT/Ripetizioni_estese.ace )
                    States ( 6 3 2
                            State (
                                    Style ( 0 )
                                    SwitchVal ( 0 )
                            )
                            State (
                                    Style ( 0 )
                                    SwitchVal ( 1 )
                            )
                            State (
                                    Style ( 0 )
                                    SwitchVal ( 2 )
                            )
                            State (
                                    Style ( 0 )
                                    SwitchVal ( 3 )
                            )
                            State (
                                    Style ( 0 )
                                    SwitchVal ( 4 )
                            )
                            State (
                                    Style ( 0 )
                                    SwitchVal ( 5 )
                            )
  )
)
Each one of the first 32 can be also used as Two-state commands/displays, like e.g.:
TwoState (
        Type ( ORTS_TCS7 TWO_STATE )
        Position ( 377 298 9 7.8 )
        Graphic ( ../../Common.Cab/Cruscotto_SCMT/Button_SR.ace )
        NumFrames ( 2 2 1 )
        Style ( PRESSED )
        MouseControl ( 1 )
)
The commands are received asynchronously by the script through this method:
public override void HandleEvent(TCSEvent evt, string message)
Where evt may be TCSEvent.GenericTCSButtonPressed or TCSEvent.GenericTCSButtonReleased
and message is a string ranging from “0” to “31”, which correspond to controls from
ORTS_TCS1 to ORTS_TCS32.
The commands may only be triggered by the mouse, except the first two which may also be
triggered by key combinations Ctrl, (comma) and Ctrl. (period).
Here’s a code excerpt from the script which manages the commands:
public override void HandleEvent(TCSEvent evt, string message)
{
    if (message == String.Empty)
    {
        switch (evt)
        {
            case ...
                                        ...
                break;

            case ...
                                        ...
                break;
         }
    }
    else
    {
        var commandEvent = TCSCommandEvent.None;
        var messageIndex = 0;
        if (Int32.TryParse(message, out messageIndex))
        {
            commandEvent = (TCSCommandEvent)(messageIndex + 1);
            switch (evt)
            {
                case TCSEvent.GenericTCSButtonPressed:
                    TCSButtonPressed[(int)commandEvent] = true;
                    break;
                case TCSEvent.GenericTCSButtonReleased:
                    TCSButtonPressed[(int)commandEvent] = false;
                    TCSButtonReleased[(int)commandEvent] = true;
                    break;
            }
        }
    }
}
Within the Update method of the script TCSButtonPressed and TCSButtonReleased may be tested, e.g.:
if (TCSButtonPressed[(int)(TCSCommandEvent.Button_Ric)])
After having tested it, TCSButtonPressed should be set to false by the script code.
You can also use TCSEvent.GenericTCSSwitchOff and TCSEvent.GenericTCSSwitchOn for a cabview control representing a switch (style ONOFF instead of PRESSED in the CVF file).
To request a display of a cabview control, method:
public Action<int, float> SetCabDisplayControl;
has to be used, where int is the index of the cab control (from 0 to 47
corresponding from ORTS_TCS1 to ORTS_TCS48), and float is the value to be
used to select among frames.
When the player moves the mouse over the cabview controls linked to commands, the name of such control shortly appears on the display, like e.g. “speedometer”, as a reminder to the player. In case of these generic commands, strings from “ORTS_TCS1” to “ORTS_TCS32” would appear, which aren’t mnemonic at all. Therefore following method is available:
public Action<int, string> SetCustomizedCabviewControlName;
which may be used this way within the script:
// Initialize customized TCS cabview control names
SetCustomizedCabviewControlName(0, "AWS acknowledge"); // Sets the name "AWS acknowledge" for the cabview control ORTS_TCS1
so that, instead of ORTS_TCSnn the related mnemonic string is displayed.
9.6.6. Helper classes
- 3 helper classes are available in the
Orts.Scripting.Apinamespace: A timer class
An odometer class
A blinker class
9.6.6.1. Timer
The timer can be used to execute some code after a time has elapsed. In order to use the timer, you have to create a property in your script class in order to store the object.
public Timer MyTimer;
In the constructor of your script class, you have to instanciate the object and set the delay of the timer.
MyTimer = new Timer(this);
MyTimer.Setup(5f); // Sets the timer's delay to 5 seconds
Then, when you want to start the timer, use the Start function.
MyTimer.Start();
If you want to reset the timer, use the Stop function.
MyTimer.Stop();
When the delay has been reached, the Triggered property of the timer will become true.
if (MyTimer.Triggered)
{
    // Do something
}
Please note that, when the timer is stopped, the Triggered property is false.
9.6.6.2. Odometer
The odometer can be used to execute some code after a distance has been traveled by the train. In order to use the odometer, you have to create a property in your script class in order to store the object.
public Odometer MyOdometer;
In the constructor of your script class, you have to instanciate the object and set the distance at which the odometer will be triggered.
MyOdometer = new Odometer(this);
MyOdometer.Setup(200f); // Sets the odometer's trigger value at 200 meters
Then, when you want to start the odometer, use the Start function.
MyOdometer.Start();
If you want to reset the odometer, use the Stop function.
MyOdometer.Stop();
When the distance has been reached, the Triggered property of the odometer will become true.
if (MyOdometer.Triggered)
{
    // Do something
}
Please note that, when the odometer is stopped, the Triggered property is false.
9.6.6.3. Blinker
The blinker can be used to make a cabview control blink. In order to use the blinker, you have to create a property in your script class in order to store the object.
public Blinker MyBlinker;
In the constructor of your script class, you have to instanciate the object and set the frequency at which the cabview control will blink.
MyBlinker = new Blinker(this);
MyBlinker.Setup(6f); // Sets the blinker frequency to 6 Hz
Then, when you want to start the blinker, use the Start function.
MyBlinker.Start();
If you want to reset the blinker, use the Stop function.
MyBlinker.Stop();
The blinker On property will alternate between true and false at the set frequency.
SetCabDisplayControl(0, RSOBlinker.On ? 1 : 0);
Please note that, when the blinker is stopped, the On property is false.